
Some options may vary depending on your AIWA plan or the features enabled for your account.
The AIWA dashboard
When you sign in to AIWA, you’ll arrive at your dashboard. This is where you can start a new project, access existing projects, and continue working on applications you’ve already created.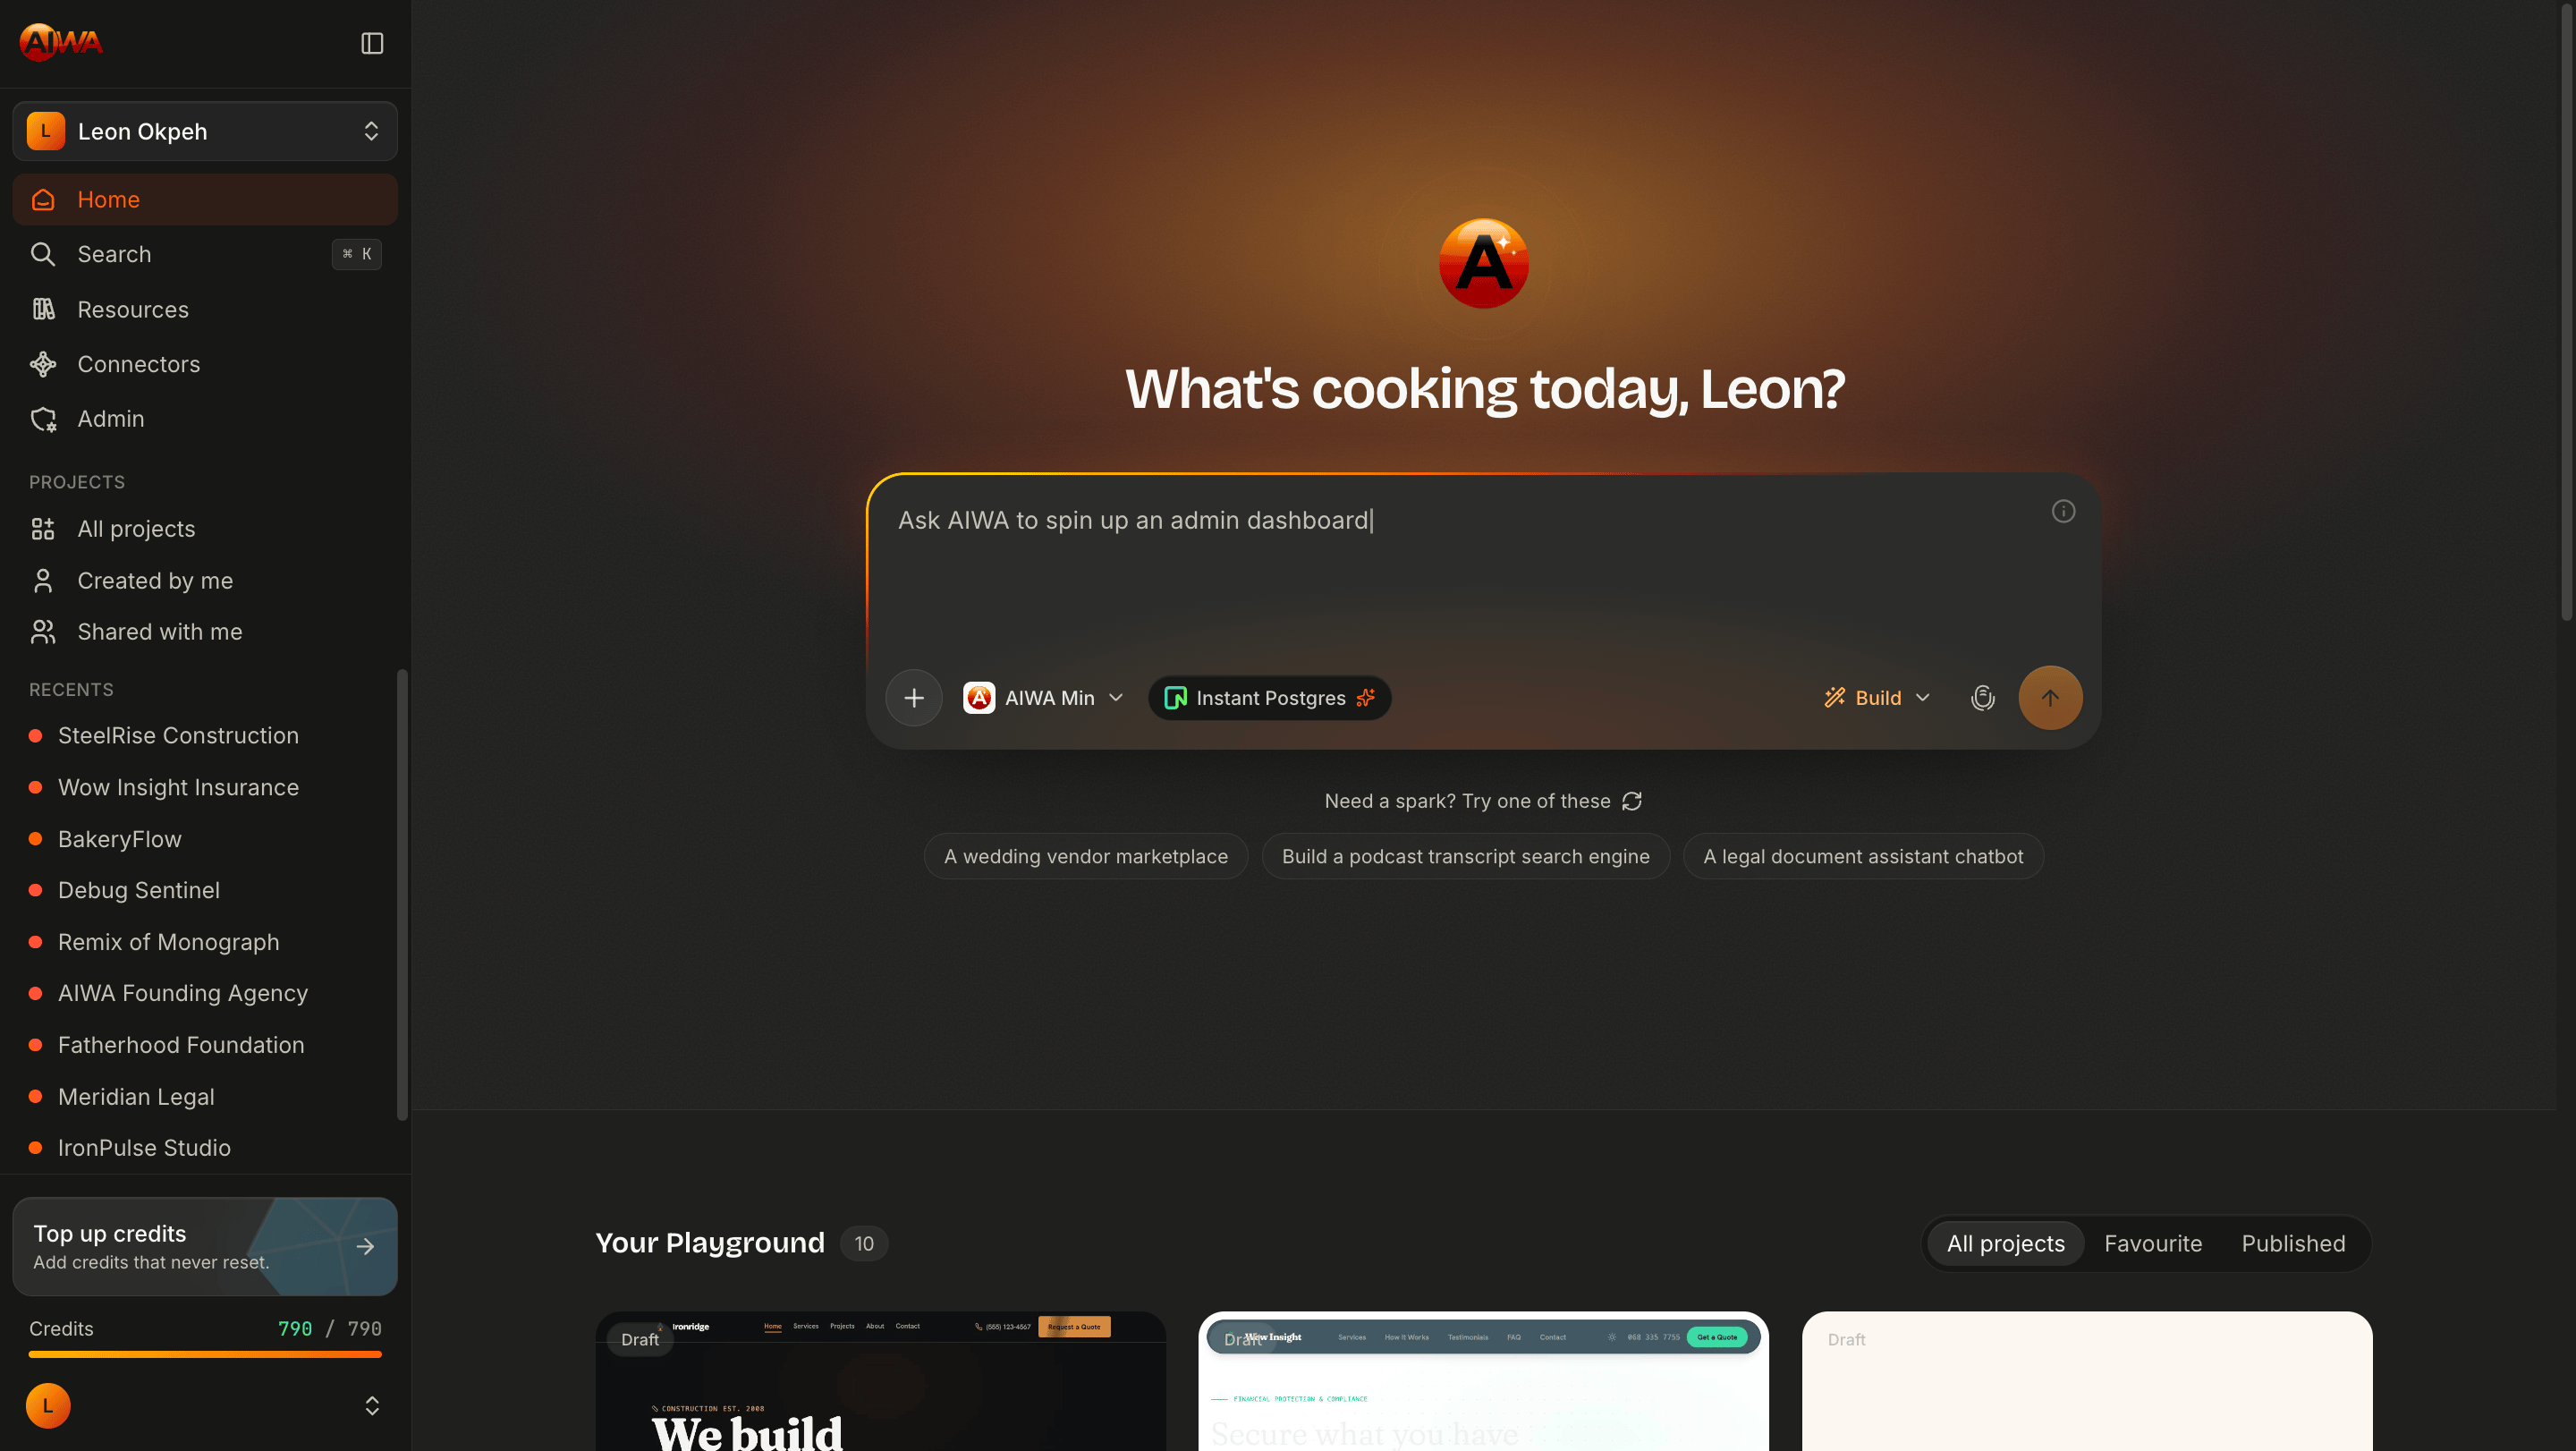
The project workspace
After creating or opening a project, you’ll enter the AIWA project workspace. This is where most of your building happens.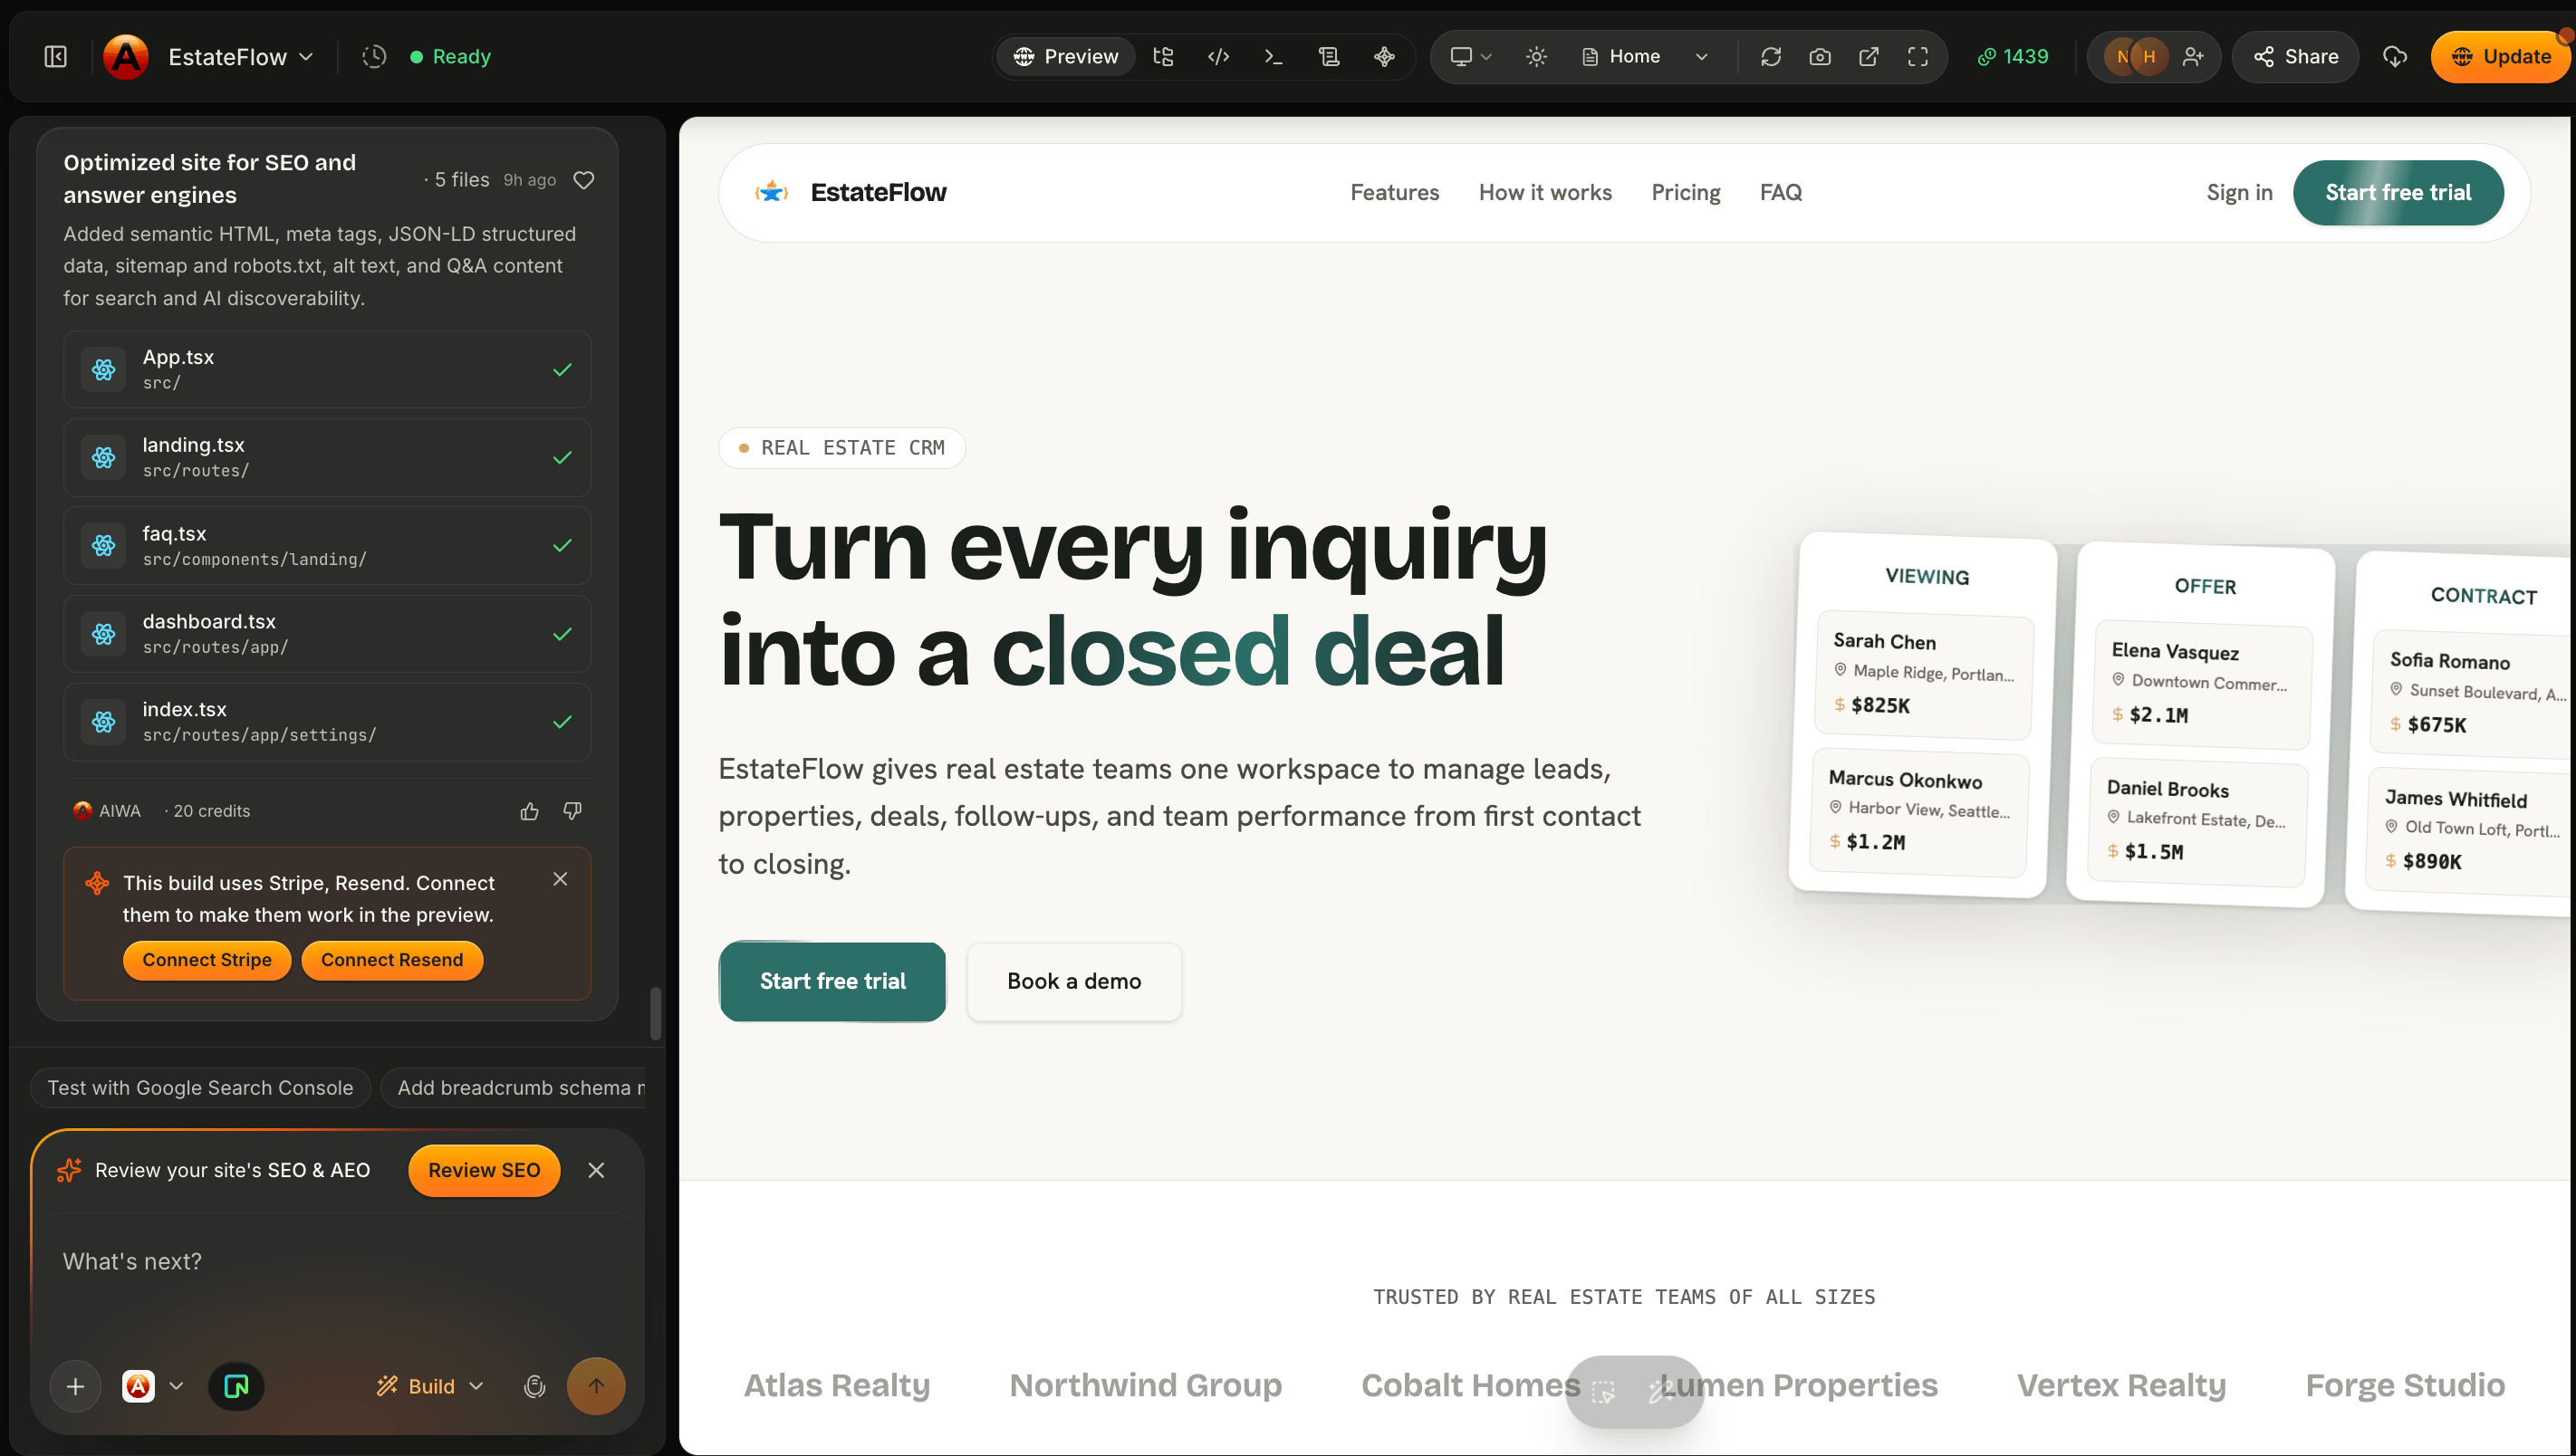
Chat with your AI product team
The conversation area is where you work with AIWA. You can use it to request new features, make changes, fix problems, or ask AIWA to improve something it has already created. For example:Change the hero section to use a darker background and make the headline more prominent.Or:
Add a project gallery with filters for residential and commercial projects.Or:
Add a contact form that saves enquiries to the database.You don’t need to create a new project for each request. Continue the conversation inside your existing project.
Build and Plan
Near the prompt area, you can choose how AIWA should approach your request. Build is used when you want AIWA to implement your request. Plan is used when you want AIWA to think through and structure the work before implementation.This is only an introduction. We’ll cover AIWA’s different working modes and when to use each one in Building with AIWA.
AIWA Min and AIWA Max
AIWA also lets you choose between different levels of AI reasoning for your work. AIWA Min is designed for faster work and straightforward tasks. AIWA Max is designed for tasks that benefit from deeper reasoning and more complex problem solving. For example, a simple text or design change may not require the same level of reasoning as architecting a multi-user SaaS application.You don’t need to worry about choosing perfectly when you’re getting started. We’ll explain AIWA Min vs AIWA Max in detail later.
Preview your application
The preview lets you see what AIWA is building. Instead of waiting until the end of development, you can inspect your application as it evolves.- Page layout
- Navigation
- Content
- Responsive behavior
- Forms and interactions
- Application workflows
Working with your project
Your project contains the files and application structure AIWA creates as it builds. Depending on the workspace view and available tools, you can inspect the project while continuing to work with AIWA. For most users, you don’t need to manually edit files to build successfully. You can simply describe the changes you want. Developers, however, can use the additional project controls when they want more visibility into the underlying application.Connectors
Connectors allow your application to work with external services. Depending on what you’re building, you may connect services for things like:- Payments
- SMS
- AI models
- File and image storage
- Calendars
- Other external services
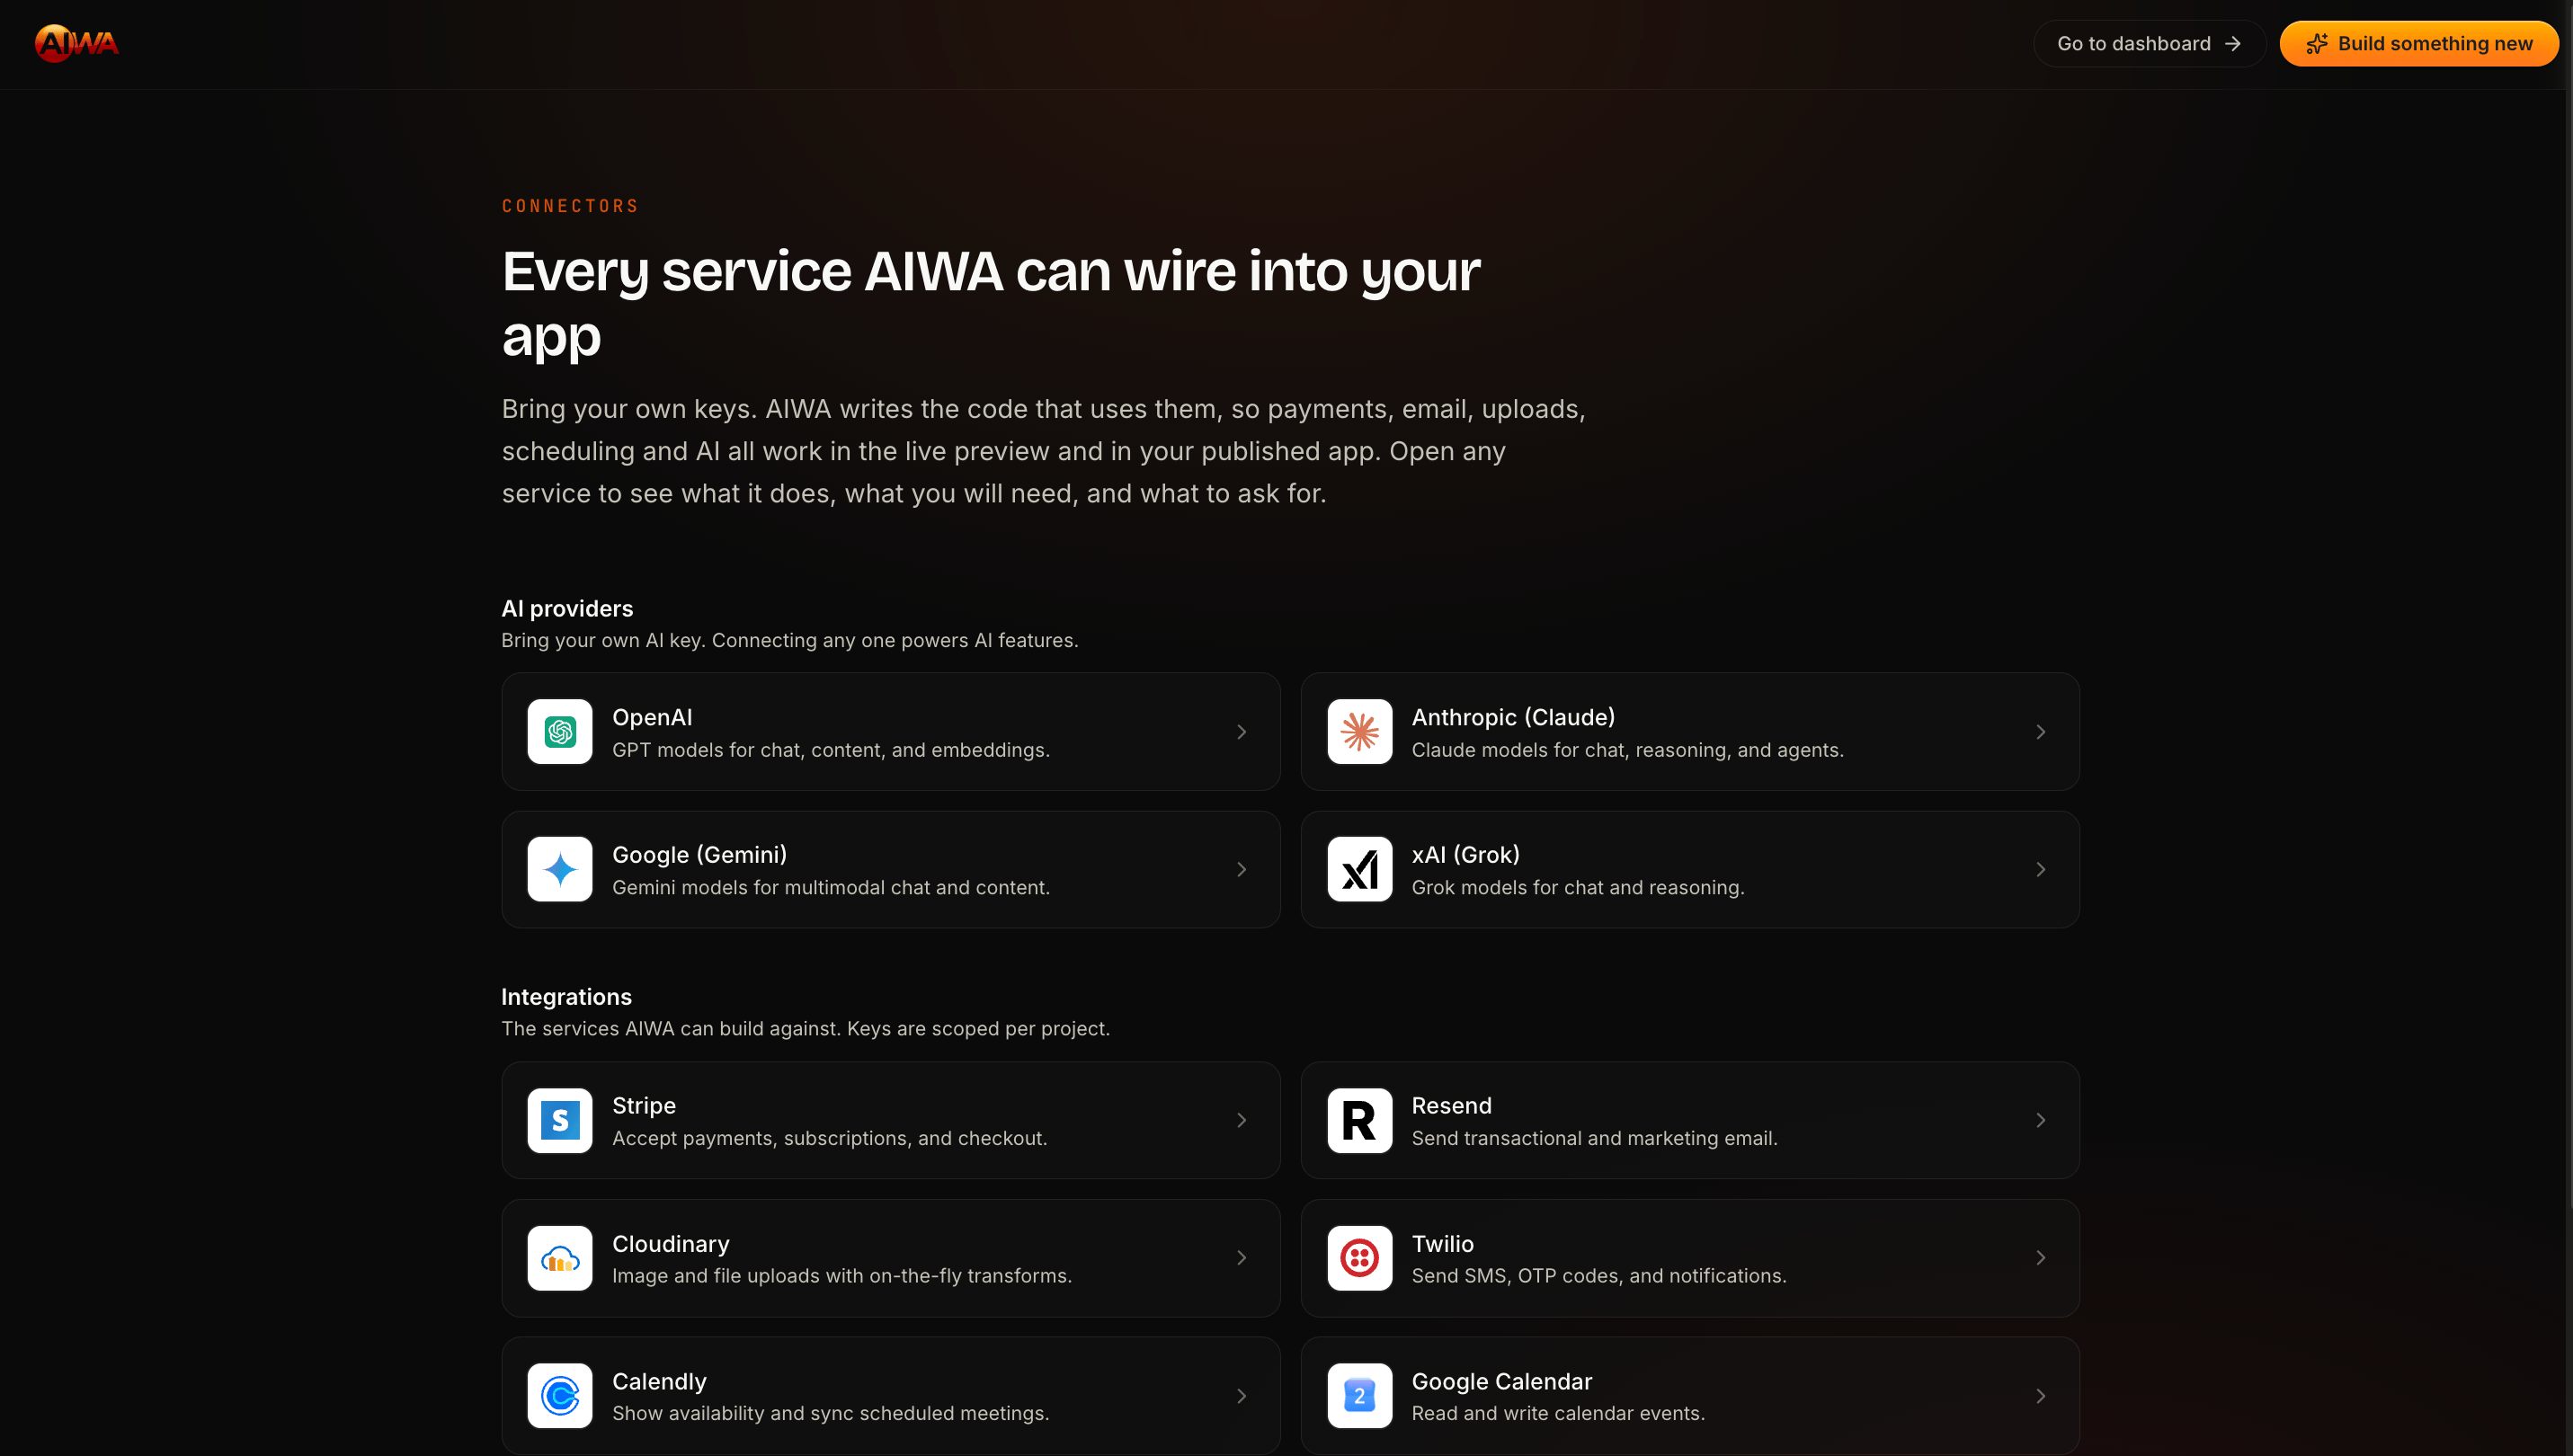
Each supported connector has its own setup guide in the Integrations (Connectors)section of these docs.
Project settings
Your project settings give you access to configuration and management options for the current application. [INSERT SCREENSHOT: AIWA project settings] The available settings may include options related to your project, connected services, deployment, and other project-level configuration. You generally won’t need to change these settings when creating your first application.Publish
When your application is ready, the Publish control takes it from your workspace to a live environment. Publishing gives you a live version of the application that can be accessed outside AIWA. We won’t publish just yet, that’s what we’ll do on the next page.You don’t need to learn everything at once
The AIWA workspace contains tools for simple websites as well as more sophisticated applications. You don’t need to understand every control before you start. For your first project, remember these four things:1
Prompt
Tell AIWA what you want to create or change.
2
Build
Let AIWA work on your application.
3
Preview
Review and interact with what AIWA created.
4
Continue
Give AIWA your next instruction and keep improving the product.
Next: Publish your first project
You’ve created a project, written your first prompt, and learned your way around the AIWA workspace. Next, let’s put your application online with Publish Your First Project.Publish your first project
Take your application from the workspace to a live URL.